Full Stack Dev. 16. Open to building cool stuff.
Posts
Hey everyone!
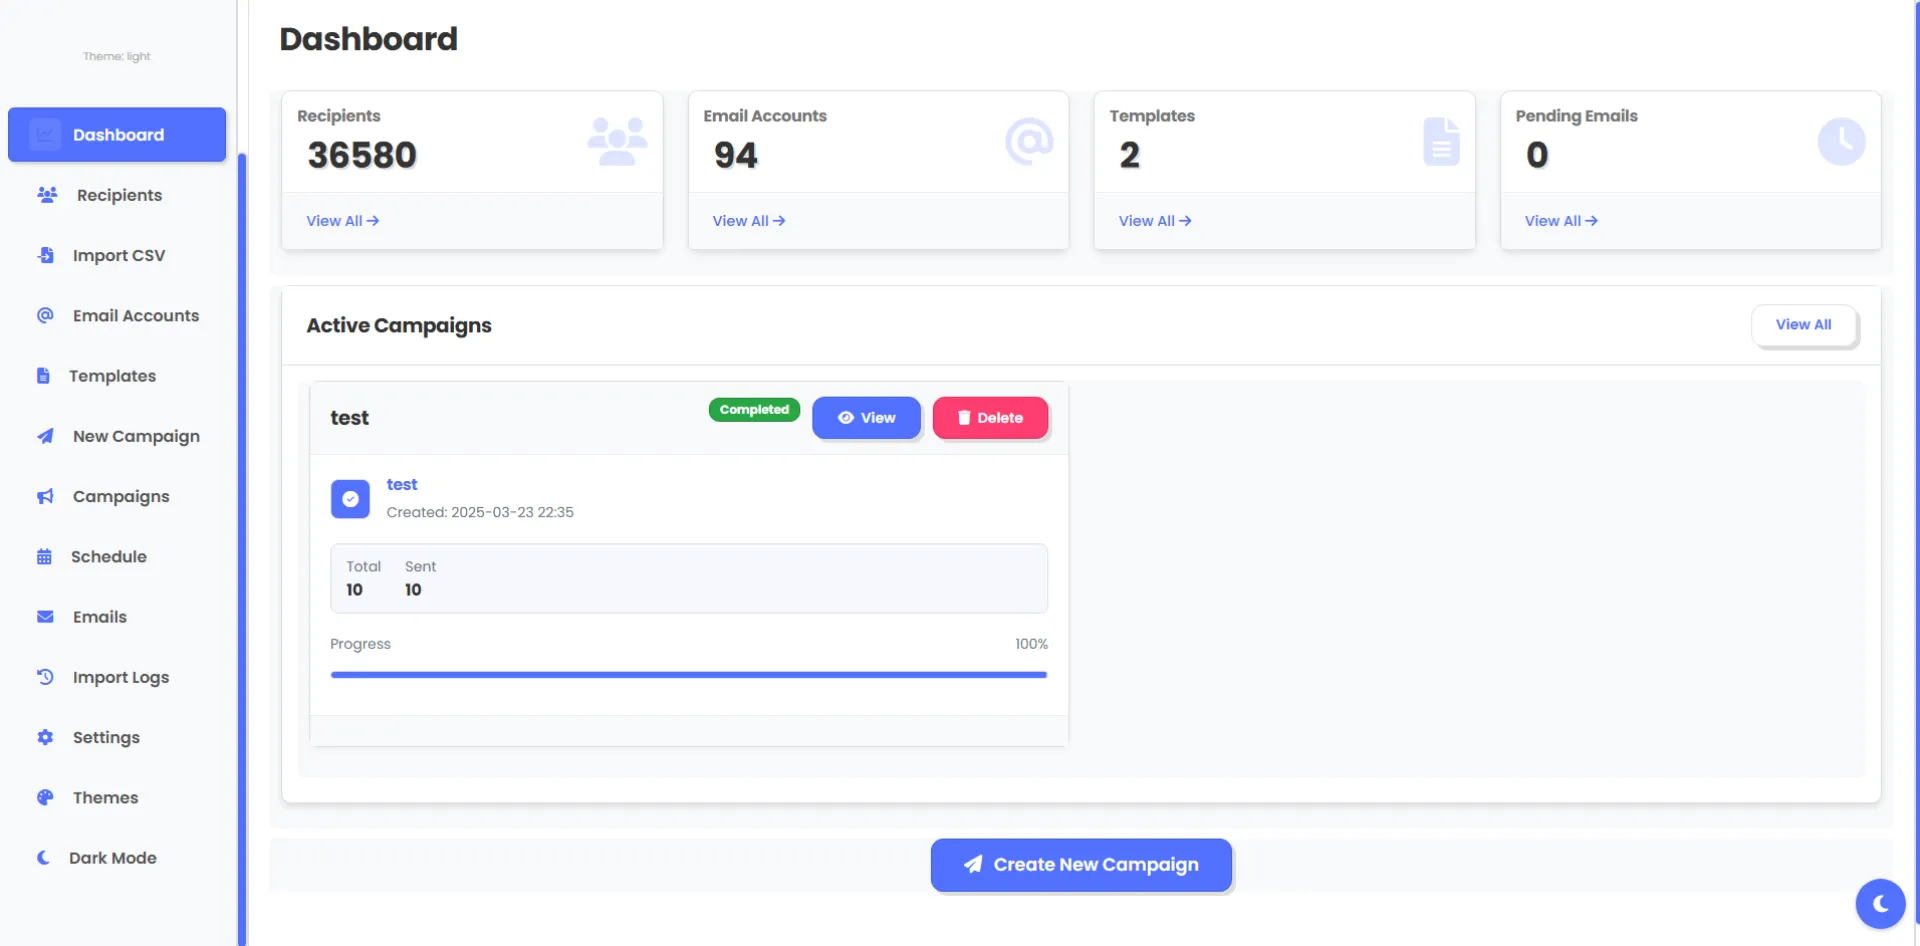
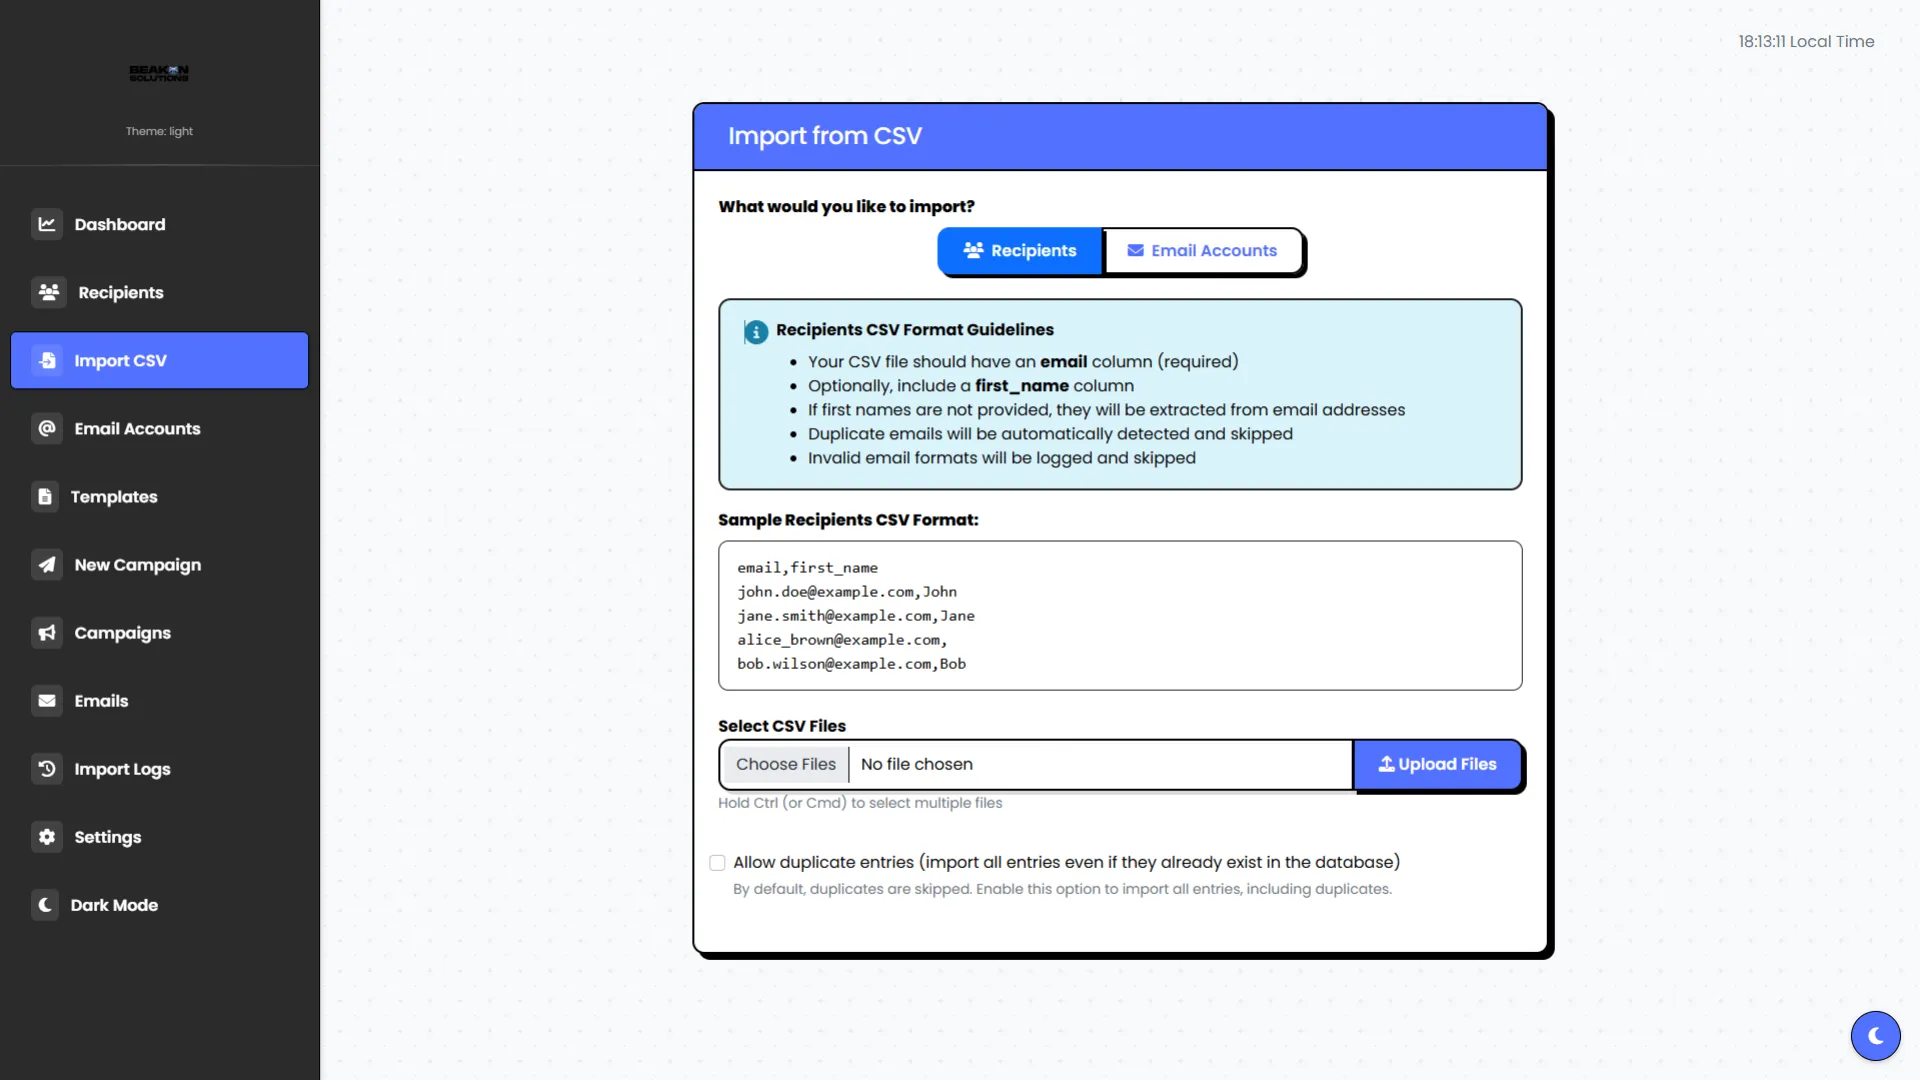
I’m looking for help selling Advanced Email Scheduling, a custom-built app I coded myself. Send an unlimited number of emails from unlimited accounts and recipients without restrictive pricing plans
Who Needs It?
This is perfect for businesses or individuals who want to reach leads directly and efficiently. Whether you’re a small business, a freelancer, or a marketer, you can add unlimited recipients and email accounts and start sending immediately, without restrictive limits or expensive plans.
I made it because many email sender services limit you to 5,000 emails a month for around $15, or force you into restrictive plans. With this, you control everything, you can send as much as you want, when you want.
Some key highlights:
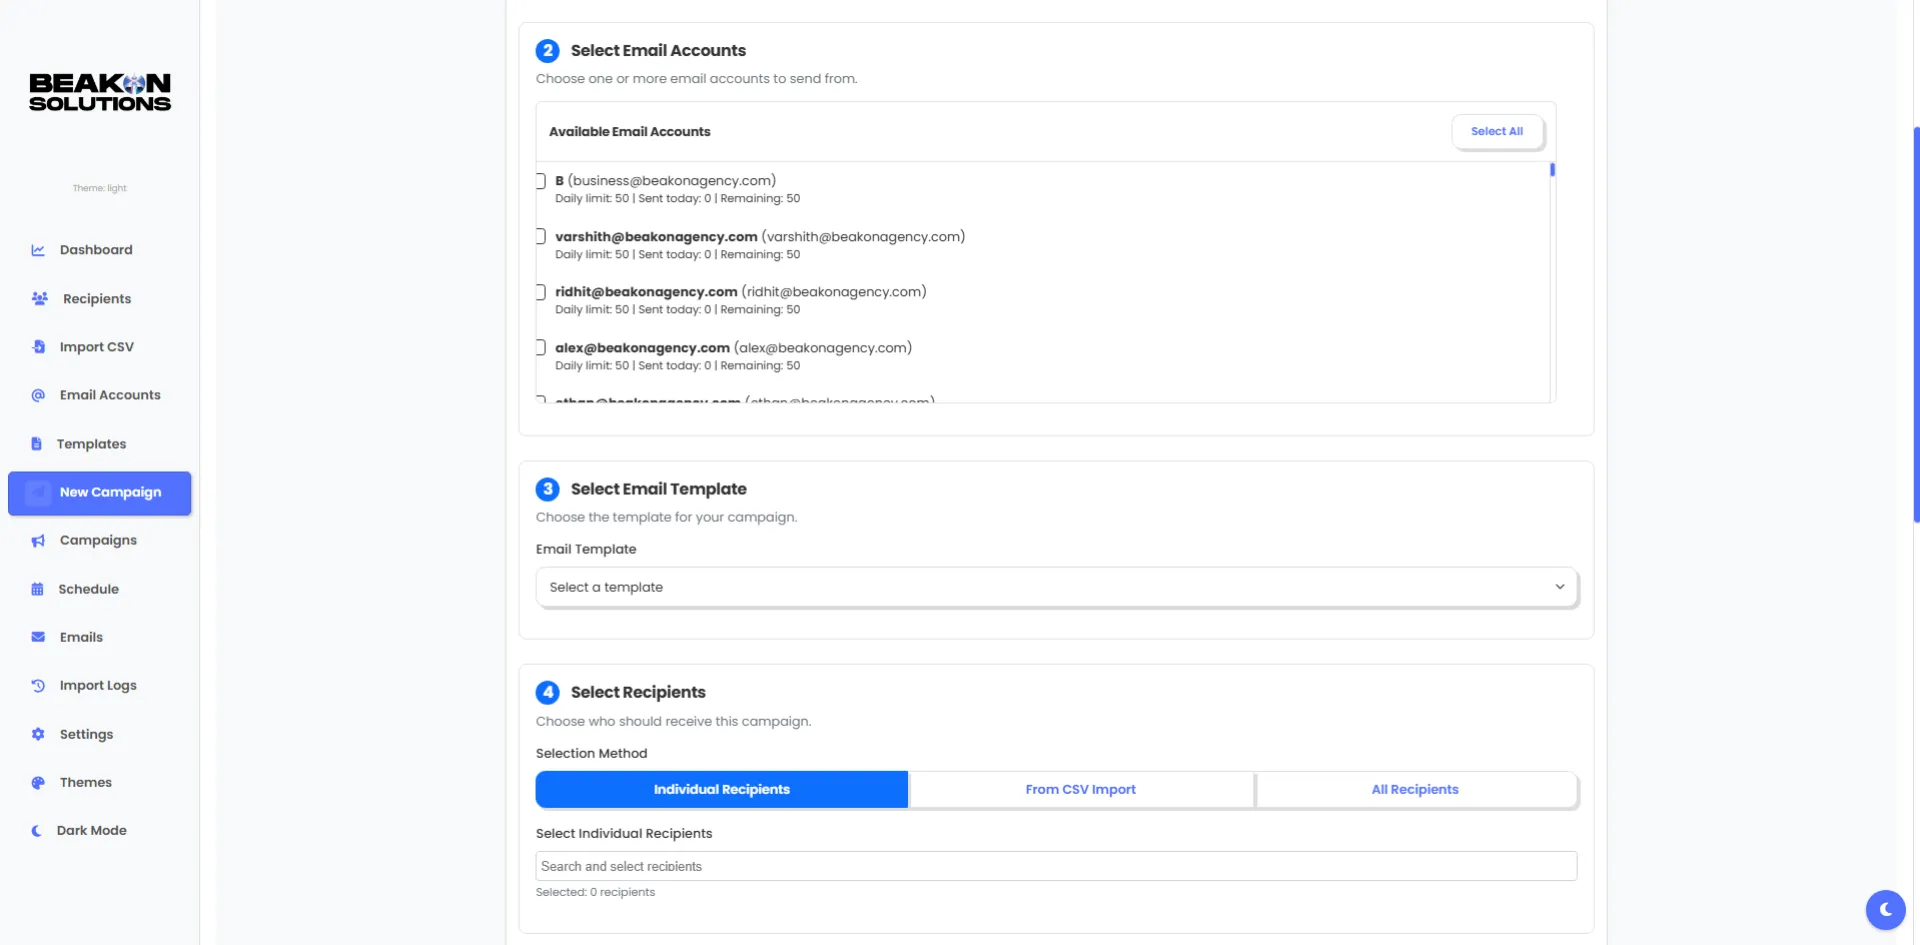
- Import recipients and emails manually or from CSV files
- Customizable templates with {name} tags for personalization
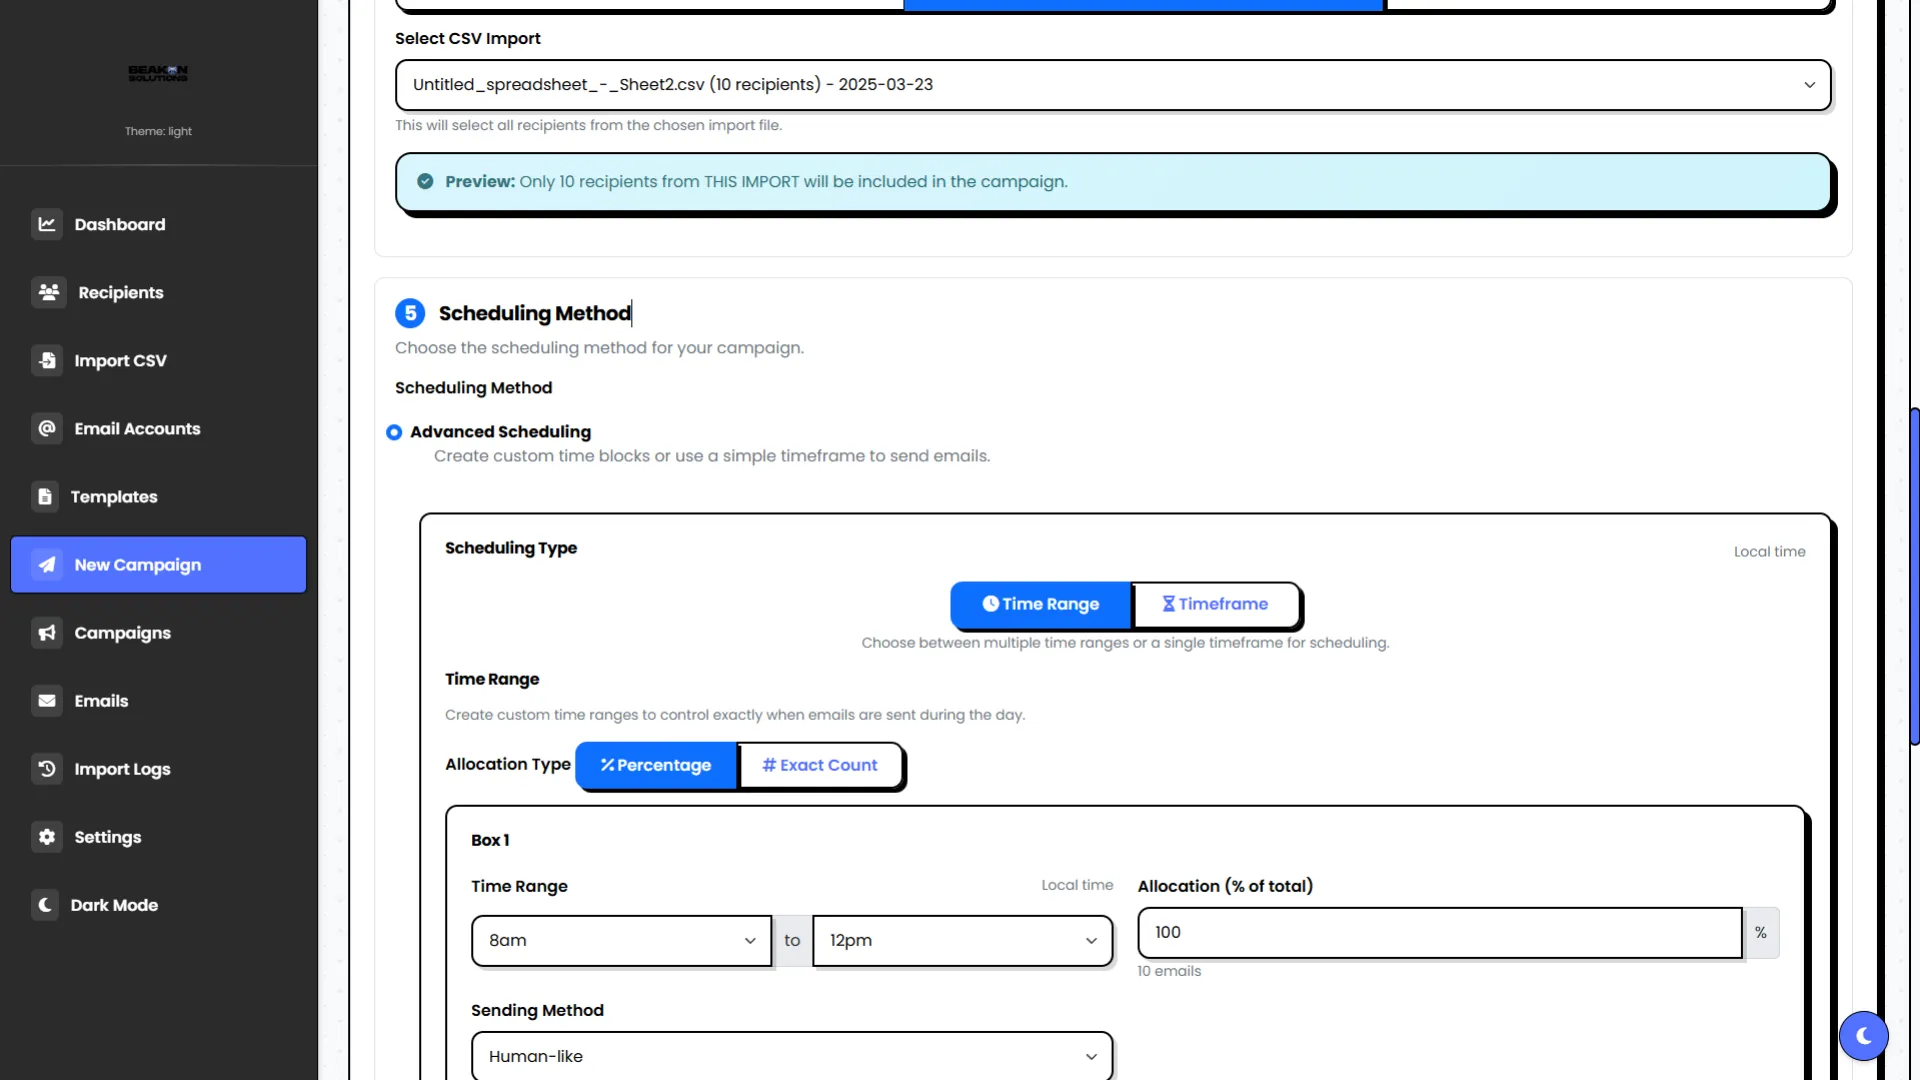
- Sending methods:
- Human-Like Method: Naturally spaces delivery to avoid looking automated and triggering spam
- Time Interval Method: Sends messages at set intervals until all are gone
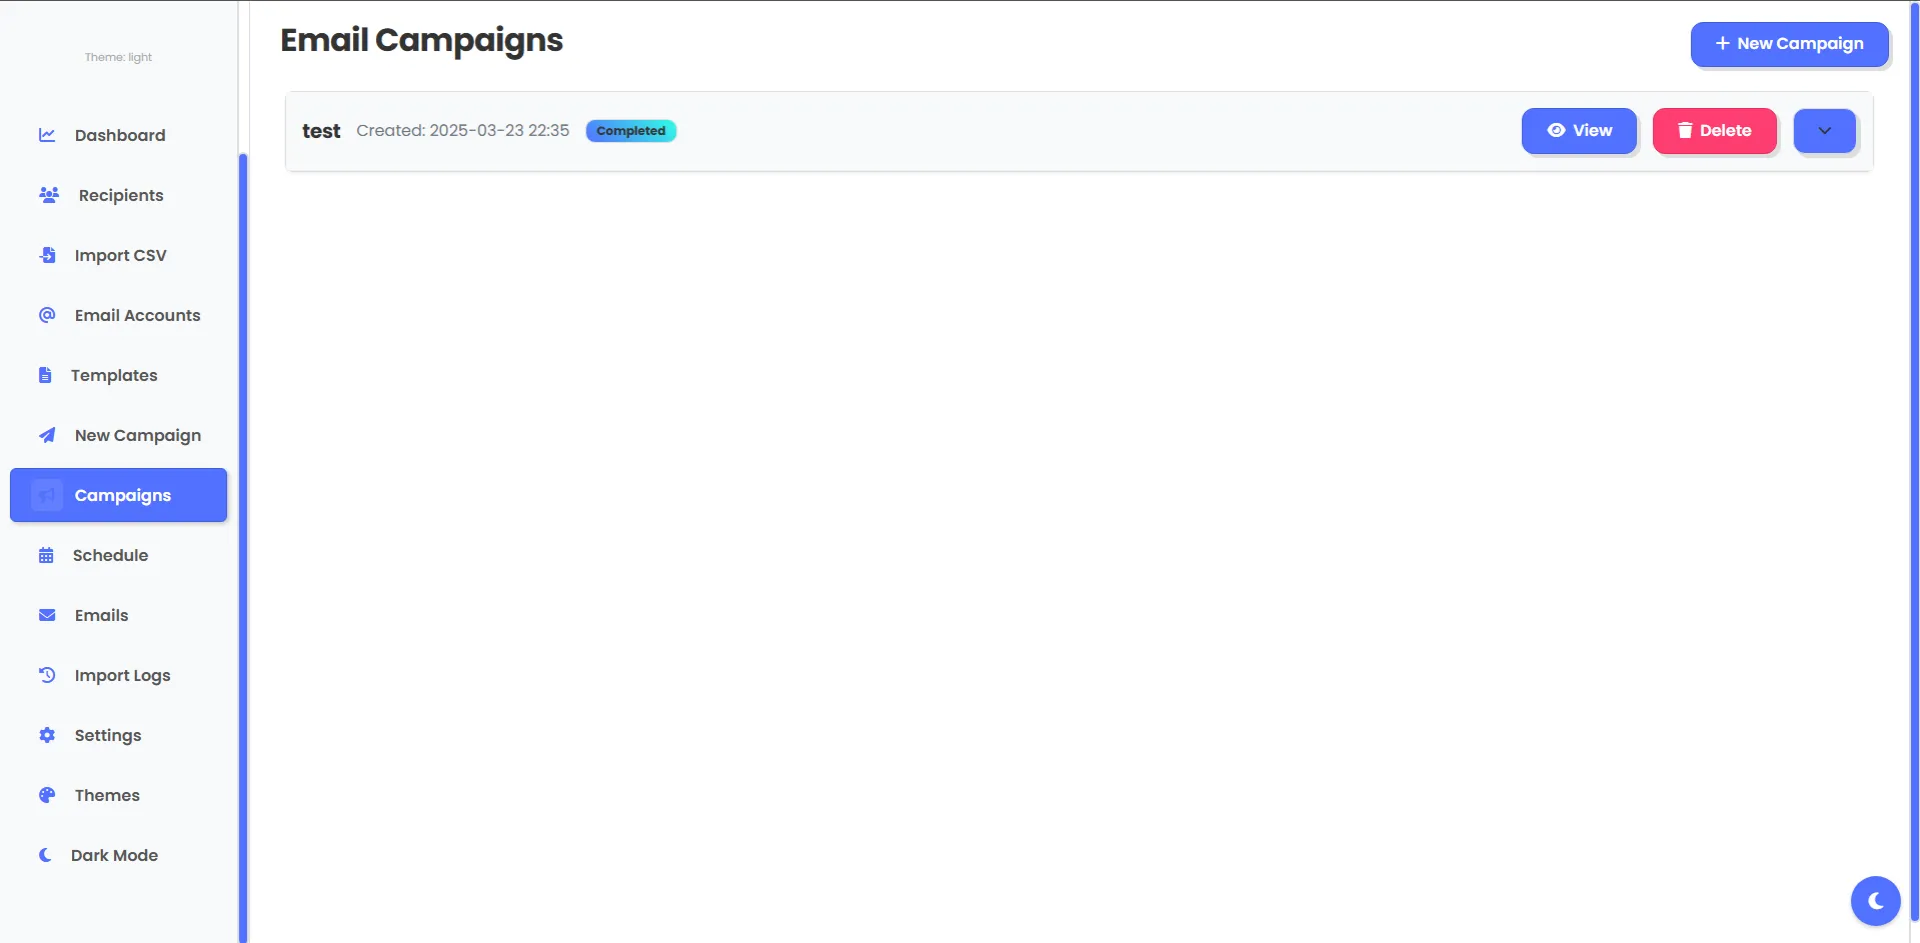
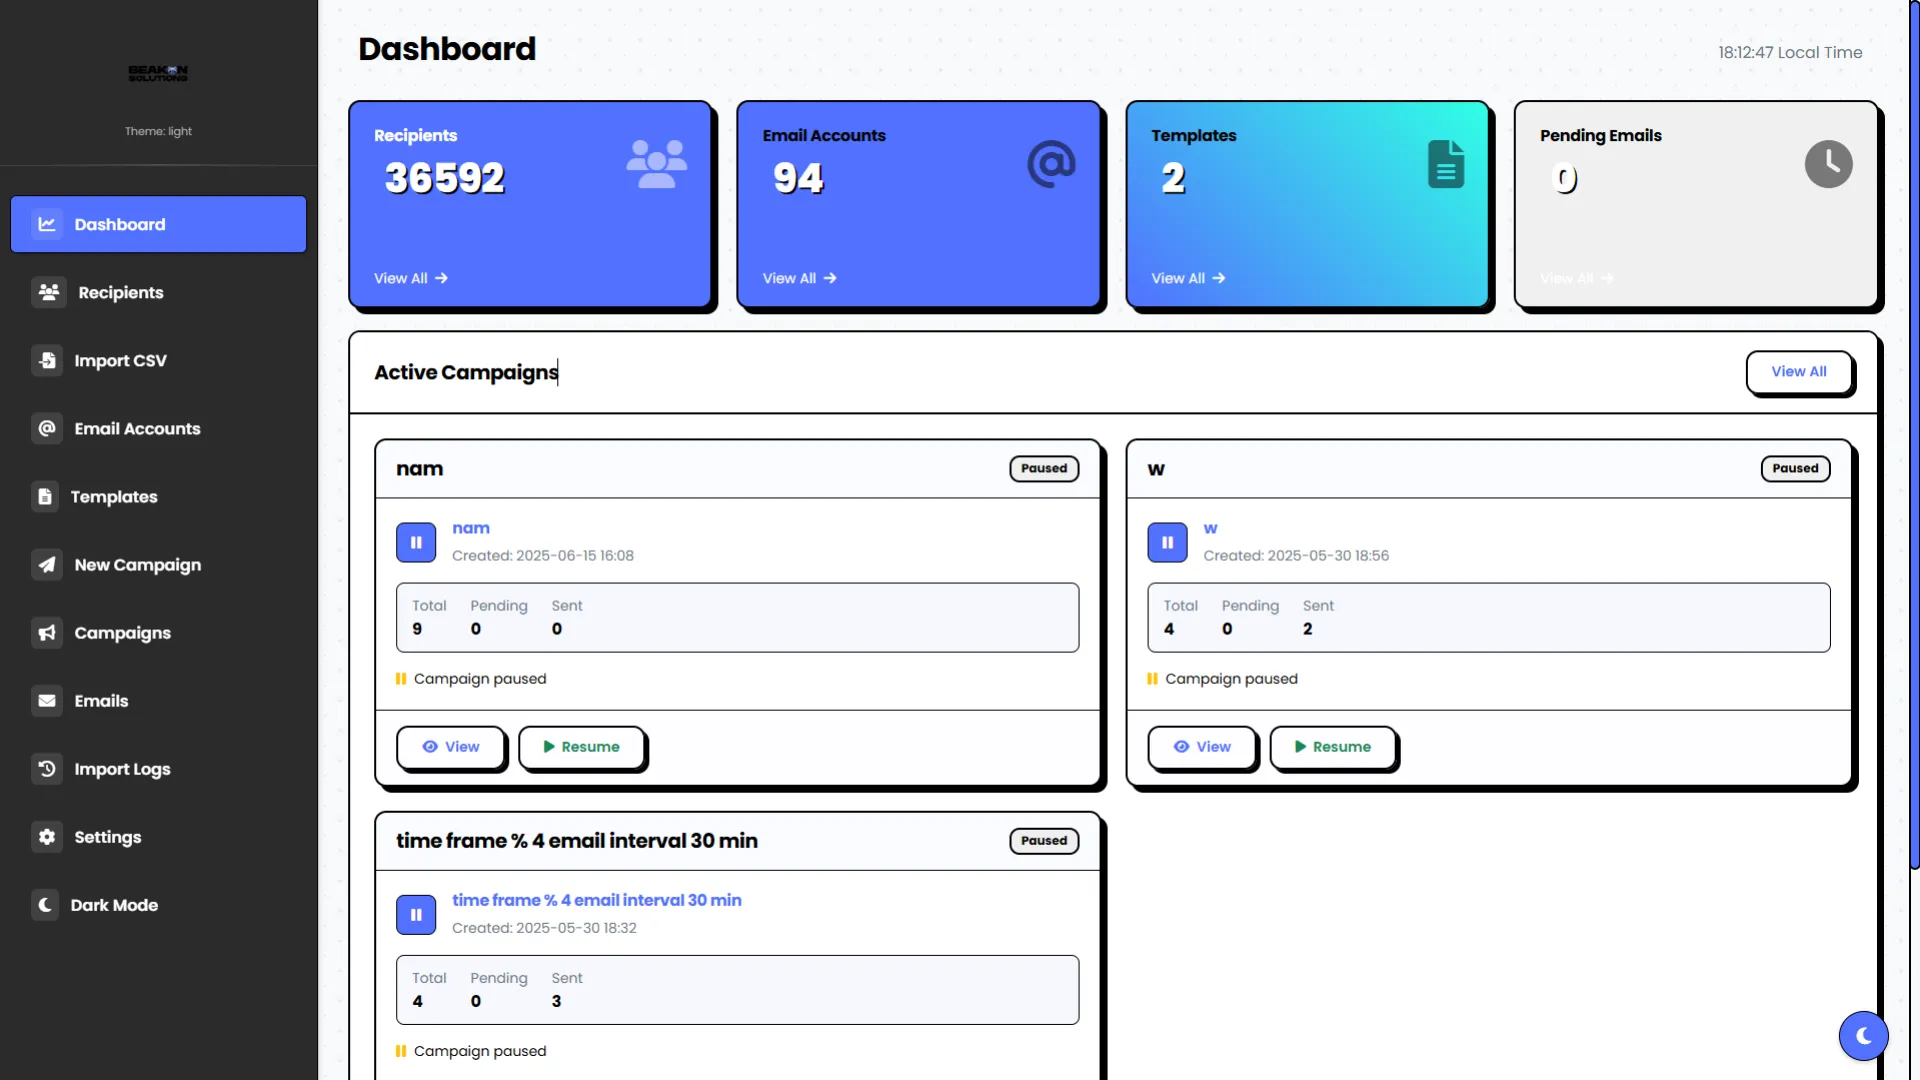
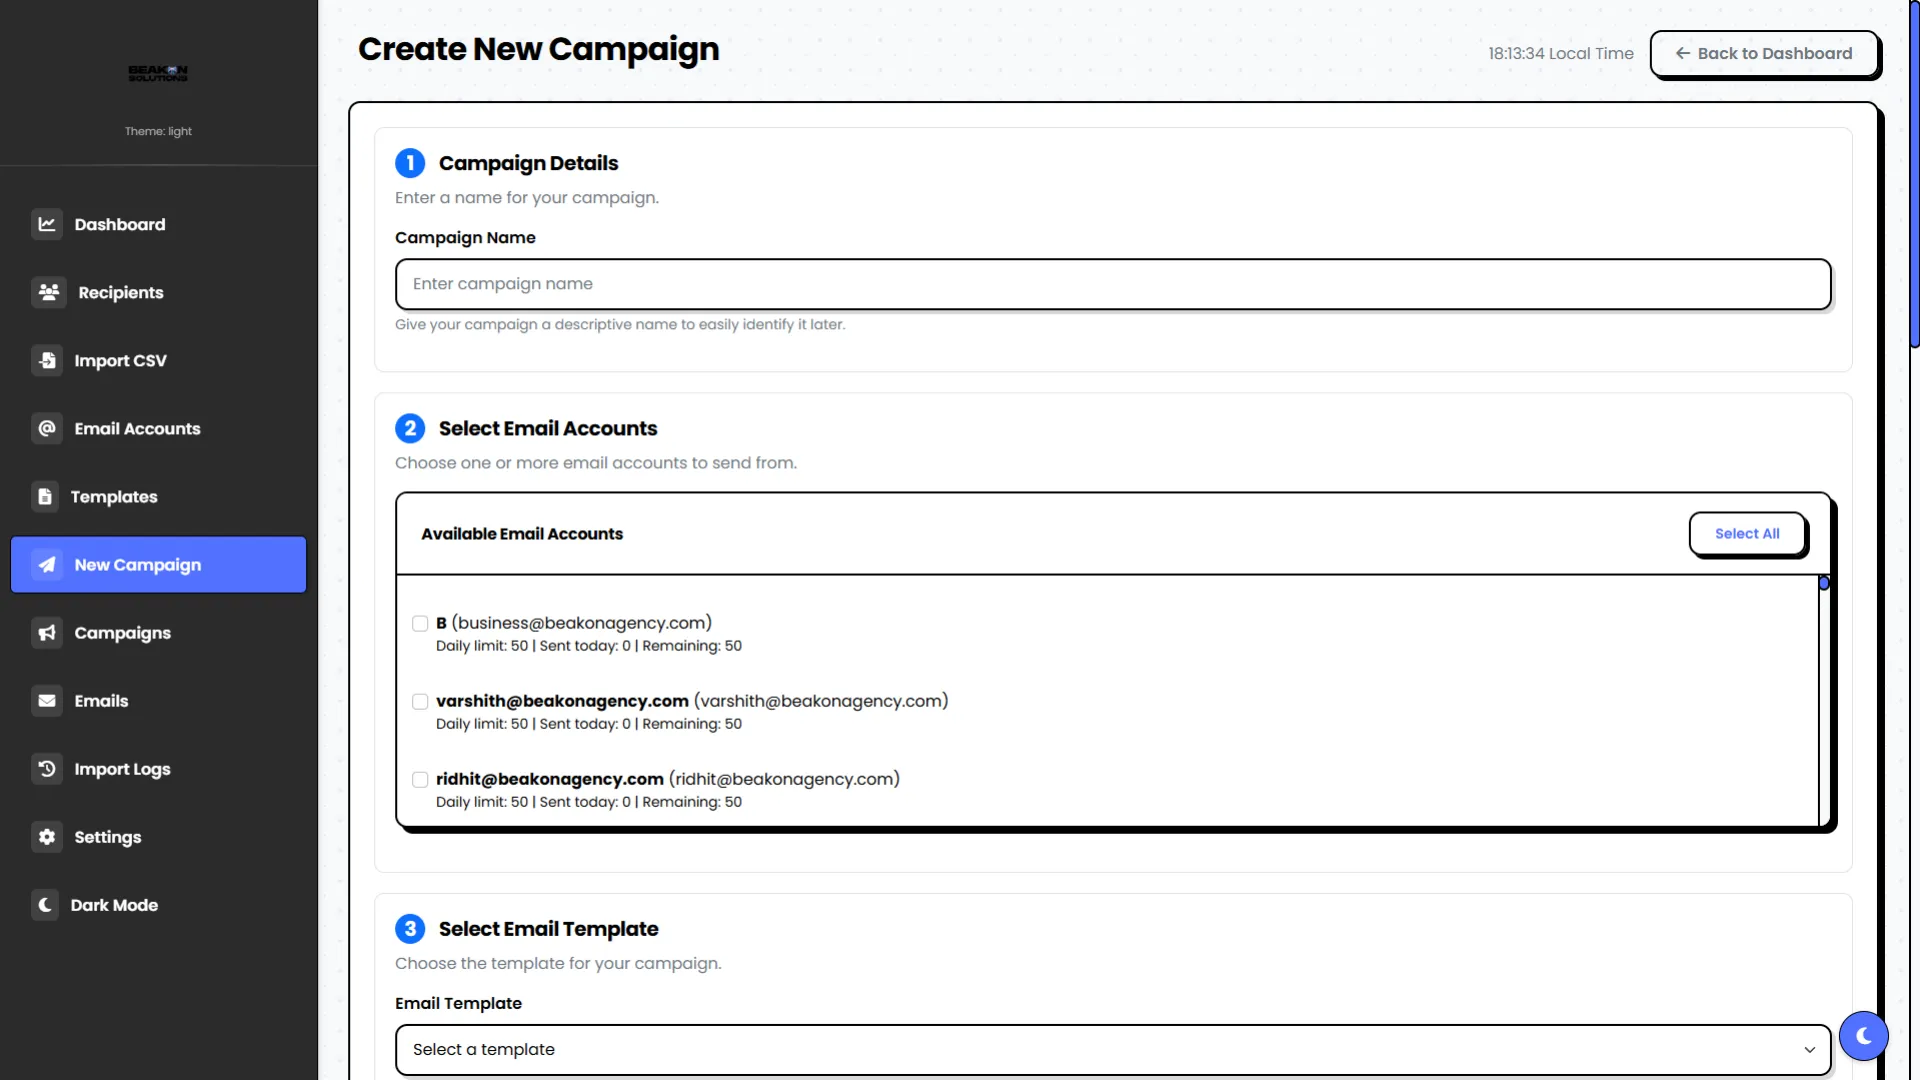
- Campaign control: View, pause, delete, or edit campaigns at any time
I made a short video walkthrough that shows exactly how it all works and covers all the main features, you can watch it to get a clear picture of what it can do.
The app is urgent for me to sell, I put a lot of effort into developing it myself, and now I’m looking for someone who finds it valuable and wants to buy it.
If you’re interested or know someone who might be, please reach out. Happy to discuss pricing, transfer, and any questions you have.
Also would be helpful if yall can give me some websites where I can list my app! Thank you
This is the 3rd part of the Vibe Coding tutorial series. If you missed the first two, you can check them out here:
- First Post - Vibe Coding: How to Build Anything Using Simple English Prompts
- Second Post - Cursor Rules Guide
This is a guide to connect GitHub with Cursor using MCP (Minimal Command Protocol). MCP allows you to interact with GitHub directly from Cursor. Once connected, you can use prompts like:
- Create a new repo with the current app you’re building
- Push your code to GitHub with a single command
- Search for repositories, pull requests, or issues
- Edit files or manage issues without needing to type Git commands
Just give Cursor a prompt, and MCP handles the rest, making your GitHub workflow effortless!
Step 1: Generate a GitHub Token
Visit this link: Generate Token
- Name your token
- Set the expiration date (I usually set it to "30 Days")
- Under Repository Access, choose “All repositories” or select specific ones as needed
Step 2: Set Basic Repository Permissions
Give read and write access to the following scopes:
- Actions
- Administration
- Commit statuses
- Contents
- Issues
Scroll down and click Generate token, then copy the token.
Step 3: Connect via Smithery
Go to: Smithery GitHub Server Setup
- Log in with GitHub
- Select the IDE you're using (Cursor, Windsurf, etc.)
- Paste your GitHub token under
githubPersonalAccessToken - Click Save and Connect
Note: Smithery is open-source, but be cautious when giving access to your personal account.
Step 4: Add GitHub MCP to Cursor
Once you've clicked Save and Connect on Smithery, you'll get two options: npm or JSON. I recommend choosing JSON.
- Click on JSON, then copy the full configuration.
- Open Cursor
- Go to Settings → MCP Servers → Add New Global MCP Server
- Paste the JSON you copied
- Hit Save
Step 5: (Optional) Enable YOLO Mode
Cursor → Settings → Features:
- Enable YOLO Mode to let the agent run tools without asking for confirmation each time
- Enable Delete File Protection so files aren’t deleted without warning
With this setup, Cursor can:
- Create/Edit and upload repositories
- Search repositories, issues, and users
- Push code directly to GitHub
- Automate workflows
Coming up next:
A full guide on installing browser-tools, no more screenshots or back-and-forth debugging. With this, Cursor can directly interact with your browser.
You’ll be able to open Inspect Element (F12), click on any section of your site, and then just go to Cursor and ask: "How can I improve this?" or "What’s wrong here?"
It can read the DOM, check console errors, network logs, and even take screenshots.
This is the second part of the original post: "Vibe Coding: How to Build Anything Using Simple English Prompts."
In this post, you’ll find the Cursor Rules Guide, which outlines essential principles for clean, simple, and effective coding in the Cursor IDE.
1. Initial Setup (Cursor Settings)
In the Cursor IDE (or the tool you are using):
- Open Cursor.
- Navigate to Settings.
- Under Rules, paste the default rules listed below or in Cursor-Rules (Google Doc) . This will provide a baseline for users.
- Tick the option Include .cursorrules file.
This will allow you to load a separate .cursorrules file from your project directory for extra flexibility.
2. Directory Setup
In the directory where Cursor is opened:
- Create a file called
.cursorrules. - Add any additional or modified rules there.
This keeps default rules safe and clean, while still letting you customize project-specific rules.
3. Community Contributions : Suggest Your Own Rules (Google Doc)
- You can comment to suggest new rules or improvements.
- I will manually review and update them.
- Even if not updated immediately, everyone can view all comments.
- Important: Please do not delete or strike out others' comments. Let’s keep it transparent and collaborative!
Note: These are all my personal rules and are mostly inspired by David Ondrej. Feel free to remove, add, or modify them based on your needs!
Cursor Rules : Cursor-Rules (Google Doc)
# Fundamental Principles
- Write clean, simple, readable code.
- Implement features in the simplest possible way.
- Keep files small and focused.
- Test after every meaningful change.
- Focus on core functionality before optimization.
- Use clear, consistent naming.
- Think thoroughly before coding. Write 2–3 reasoning paragraphs.
- Always write simple, clean, and modular code.
- Use clear and easy-to-understand language. Write in short sentences.
# Error Fixing
- DO NOT JUMP TO CONCLUSIONS! Always consider multiple possible causes.
- Explain problems in plain English.
- Make minimal necessary changes.
- For strange errors, ask the user to perform a Perplexity web search.
# Building Process
- Verify each new feature works by telling the user how to test it.
- DO NOT write complicated and confusing code.
- Opt for simple and modular approaches.
- When unsure, tell the user to perform a web search.
# Comments
- ALWAYS add helpful and explanatory comments into the code.
- NEVER delete old comments unless obviously wrong or obsolete.
- Include LOTS of explanatory comments.
- Document all changes and their reasoning inside comments.
- When writing comments, use clear and easy-to-understand language. Write in short sentences.
If you're looking to build a SaaS, web app, or even a website without coding knowledge, Cursor is the tool you need. This guide will walk you through the process of Vibe Coding, which means building apps and websites using simple English prompts and Cursor. You don’t need to write complex code, just interact with ChatGPT and Cursor, and you're good to go.
Step 1: Watch the Setup Guide
Before you dive in, make sure you set up Cursor properly to unlock its full potential. Here's a guide by DavidOndrej that explains the best settings for Cursor: Watch the setup guide here.
Step 2: Brainstorm Your Idea with ChatGPT
Once Cursor is set up, the next step is to brainstorm your app idea with ChatGPT. Use ChatGPT to clarify your app's functionality and structure. Here's how:
- Think about the app you want to build – What will it do?
- Ask ChatGPT for help with your tech stack and features.
For example, you might ask:
"I want to build a SaaS for goal tracking with user login, a dashboard showing charts, and a settings page. What tech stack should I use?"
Once you get a solid idea, ask ChatGPT to generate a prompt for Cursor that will help you build the app.
Step 3: Set Claude 3.7 Thinking and Send the Prompt to Cursor
Now, you’re ready to send the prompt to Cursor. Before doing that, make sure to select Claude 3.7 Thinking for the best results. This setting improves the quality of the code generation by making Cursor think through the task in more depth. Once Claude 3.7 Thinking is enabled, send your prompt to Cursor. Once you send the prompt, Cursor will generate the code for your app.
Step 4: Send Screenshots and Design Inspirations
To help Cursor understand the exact design you’re going for, you can send screenshots or inspired designs. These will guide Cursor to match the UI and UX style you want. For example, send design inspirations like:
- Neo Pop Web Design
- Gumroad UI
Make sure to include the design name so Cursor can interpret the style you're aiming for. This step ensures Cursor builds your app exactly the way you want it.
You Can Also Build Websites!
Not just apps, Cursor can also help you build websites! If you have a web design screenshot or a style in mind, simply send it to Cursor along with the languages you want to use (e.g., Tailwind for styling). Cursor will generate the code and design for the website based on your prompt.
This makes website building as easy as building a SaaS app, all by just providing a clear prompt and some design references.
- Example: I created a fully functional website from scratch in just 1 hour using Cursor, with only 5 simple prompts and a few design screenshots along with their names. Check it out here: Website built with Cursor
Free Version and Building Your SaaS
- You can use up to 3 free accounts on your PC to build your SaaS app using Cursor.
- If you need more free accounts while building, just let me know. I have a method (which I don’t encourage but can help if your SaaS is still in development) to get more free accounts.
Final Thoughts: Build Anything with the Right Prompts
With Cursor and ChatGPT, you can build anything from simple websites to full-scale SaaS apps. Whether you’re starting with a goal-tracking SaaS, a simple website, or any other project, Cursor allows you to bring your ideas to life without writing complex code. Just focus on creating clear prompts and Cursor will take care of the rest.
Hey folks, quick question!
I built an email automation tool for personal use - it lets you send unlimited emails using your own email accounts (no limits like 5k/month), supports scheduled campaigns, and includes a “human-like” mode to avoid spam filters.
I originally made it because all other tools had strict caps or were expensive.
If there’s real demand for something like this, I’m looking to sell the entire SaaS - not planning to turn it into a business.
Appreciate honest feedback!